
How to Pack a Balanced Work Lunch That Still Tastes Good at Noon
A balanced packed lunch does not need seven tiny containers or a Sunday of elaborate meal prep. It needs four jobs covered—produce, protein, a satisfying carbohydrate, and flavor—plus temperature control when the food is perishable. The difference between a lunch you plan to eat and one you actually enjoy at noon often comes down to moisture and texture.
Build lunch with a flexible four-part formula
Use this as an assembly guide, not a rigid diet rule:
- Produce: vegetables, fruit, or both. Use what is affordable and practical—fresh, frozen and thawed, roasted, or canned and drained can all work.
- Protein: beans, lentils, eggs, chicken, tuna, tofu, yogurt, cheese, or another food that suits your needs.
- Carbohydrate: whole-grain bread, brown rice, quinoa, pasta, corn, potatoes, or crackers. The portion should reflect your appetite and activity rather than a universal number.
- Flavor and texture: dressing, salsa, pesto, herbs, nuts, seeds, pickles, or a crunchy topping.
This framework leaves room for dietary needs, culture, budget, and leftovers. Someone with allergies or a condition requiring a specific eating plan should adapt it with qualified guidance.
Keep wet ingredients away from crisp ones
The main enemy of a good packed lunch is not time; it is migration. Dressing soaks greens. Tomato moisture softens bread. Steam trapped around warm food creates condensation.
Portion cooked components into shallow containers and refrigerate them promptly; do not wait for perishable food to reach room temperature or leave it out for hours. Once chilled, transfer the portion to the lunch container if needed. Put dressing and juicy ingredients in separate compartments. Dry washed greens thoroughly. Keep nuts, seeds, croutons, and crackers away from moisture until eating. For a sandwich, place cheese or sturdy greens between wet filling and bread, or assemble it at lunch.
The OXO Prep & Go Salad Container is designed around this problem. OXO lists a 6.3-cup capacity, a removable shallow tray to separate toppings, a dressing container, and a watertight lid secured by a silicone gasket and two clips. It is especially relevant for composed salads or grain bowls that need separate crunchy and wet elements. Its tradeoffs are bulk and specialization: a simple lidded container plus a small leak-resistant jar may serve just as well if you pack sandwiches or have limited bag space.
Three lunches that hold up until noon
Mediterranean grain bowl
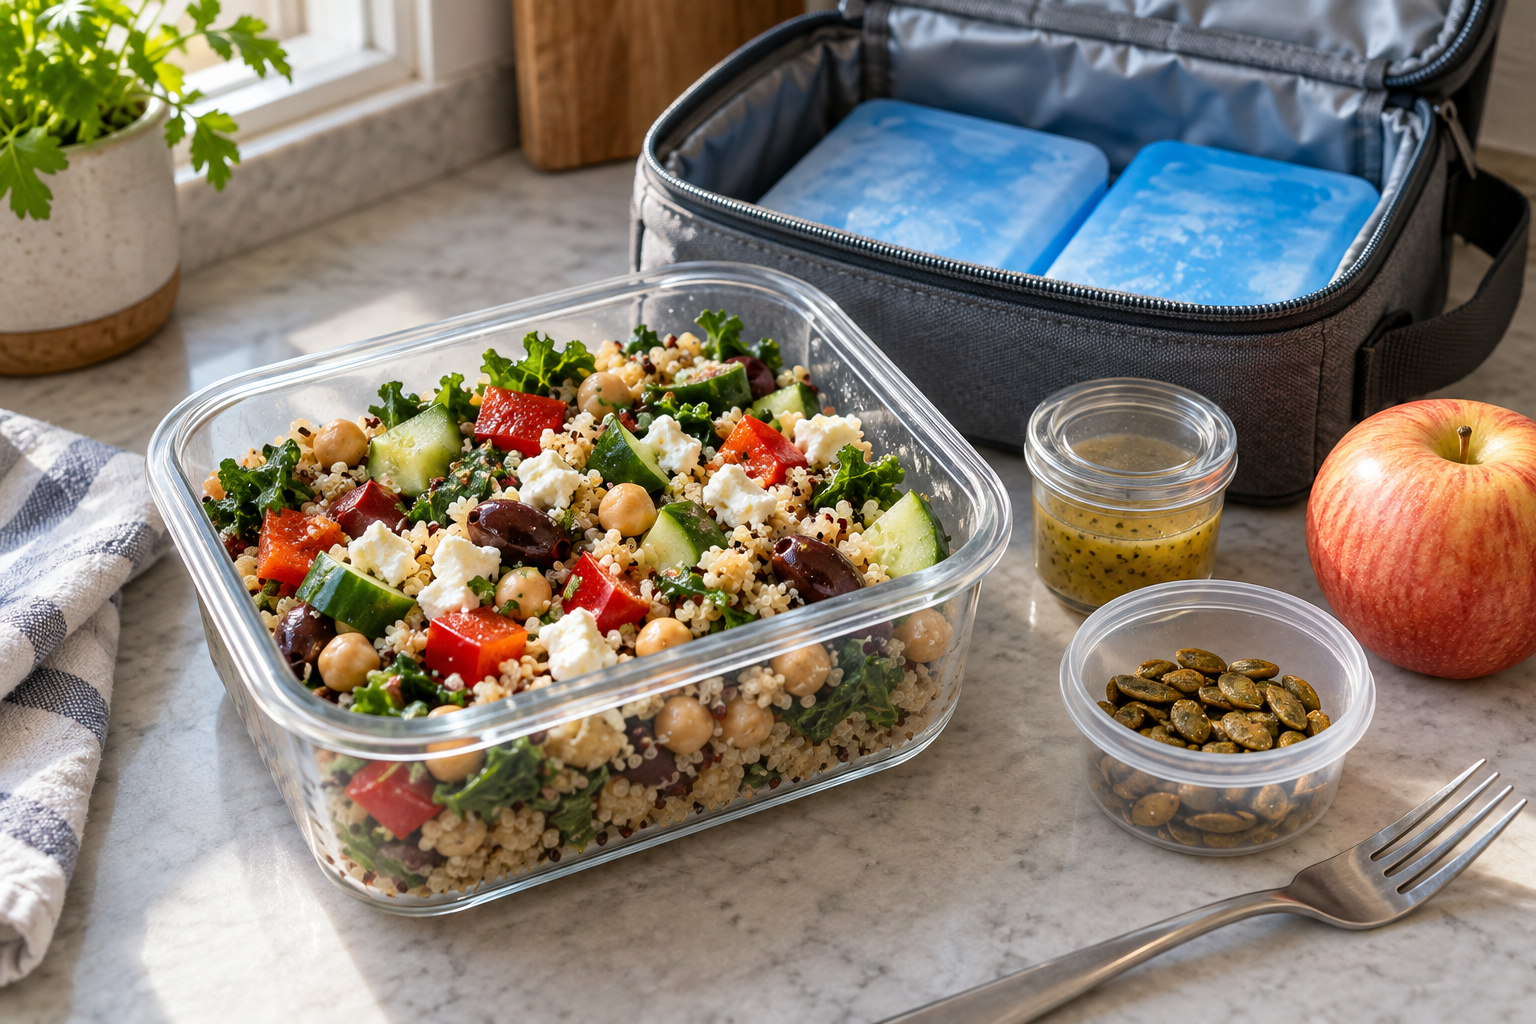
Pack 3/4 to 1 cup cooked quinoa or farro with 1/2 cup rinsed chickpeas, chopped cucumber, bell pepper, olives, and feta if desired. Put lemon-olive-oil dressing in the dressing cup and toasted seeds in the upper tray. Add a piece of fruit. Toss only when ready to eat.
Crunchy chicken or tofu salad
Use 2 to 3 cups dry, sturdy greens or shredded cabbage, then add about 3 to 4 ounces cooked chicken or tofu and vegetables such as carrots and snap peas. Keep dressing, sliced almonds, and wonton strips separate. If using leftovers, make sure the protein was refrigerated promptly after cooking.
Snack-style lunch
Pack hummus, whole-grain pita or crackers, sliced peppers and cucumbers, fruit, and a hard-cooked egg or another protein. Separate juicy fruit from crackers. This works well when you have only a short break or no convenient place to reheat food.
These are templates, not nutritional prescriptions. Increase, reduce, or swap components to fit hunger, medical needs, and what you already have.
Pack for food safety, not just appearance
Perishable foods should remain cold. Keep cold perishable foods at 40°F (4°C) or below. FoodSafety.gov’s meal-prep guidance recommends an insulated lunch bag with two cold sources, such as frozen gel packs or a frozen water bottle combined with a gel pack. Refrigerate the bag on arrival if a refrigerator is available. Keep it away from direct sun or a hot car.
If packing hot food, preheat an insulated container with boiling water according to its instructions, empty it, add food heated to a safe serving temperature, and close it promptly. Keep hot food at 140°F (60°C) or above until lunchtime. Do not use the salad container as a hot-food thermos; it is designed for storage, not heat retention.
Wash the container, gasket, tray, and dressing cup after use, paying attention to grooves where food can remain. Replace a container that is cracked or no longer seals reliably.
Make tomorrow’s lunch while dinner is already open
The easiest prep window may be the ten minutes after dinner, not a separate weekend project. Put one serving of cooked grain or vegetables aside before storing the rest. Drain a can of beans, mix a small dressing, and pack dry toppings separately. Put the cold packs in the freezer, keep the packed lunch in the refrigerator, and place a reminder beside your keys.
If salads and grain bowls are common in your week, review the OXO container’s layout against your usual portion and lunch-bag dimensions. Buy it for the separation system, not because a special container is required. The useful principle is simpler: balance the meal, control temperature, and keep contrasting textures apart until noon.
Before closing the refrigerator, run a ten-second check: produce, protein, carbohydrate, flavor; wet parts sealed; crunchy parts dry; lunch labeled if shared; two cold sources ready for the morning. Keep utensils beside the lunch bag so they are ready to go in the morning.